Springnest makes it quick and easy to publish news, events, special offers or information about your destination. Publishing blog articles is a powerful way to keep your content relevant, up to date, and to drive traffic to your website.
How to write and publish an article in Springnest
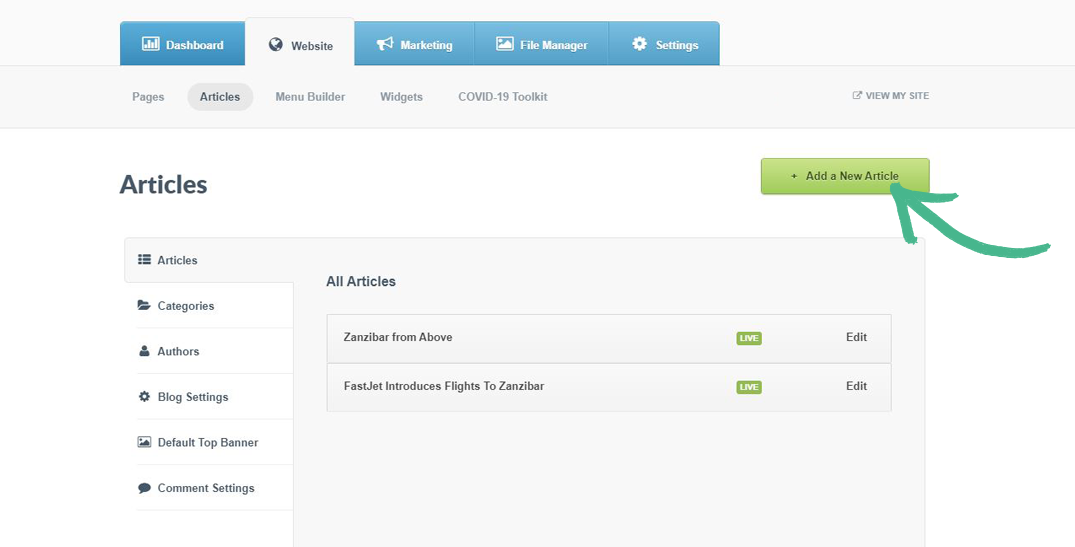
Step 1: Select the Website tab > Click Articles > Click the +Add a New Article button
Note: If you have existing articles on your website, they will appear below All Articles, in a list.

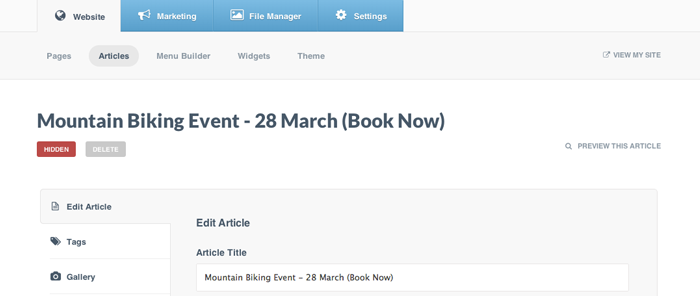
Step 2: Complete the Article Title field

Step 3: Your article has been created

Step 4: Complete the Summary field > Think of it as a teaser to encourage your visitor to read through the rest of your article

Step 5: Complete the Content field > Use the text editor to edit text styles and add links to other content

Step 6: Click +Add Media in order to add an image or a video for your article

Step 7: Specify a Article Category > Select from the drop-down list or Click +Add Category > Complete the pop-up menu > Click Create
Note: Categories make it easy for your readers to explore content around a specific theme or topic you write about

Step 8: Specify a Author > Select from the drop-down list or Click +Add Author > Complete the pop-up menu > Click Create

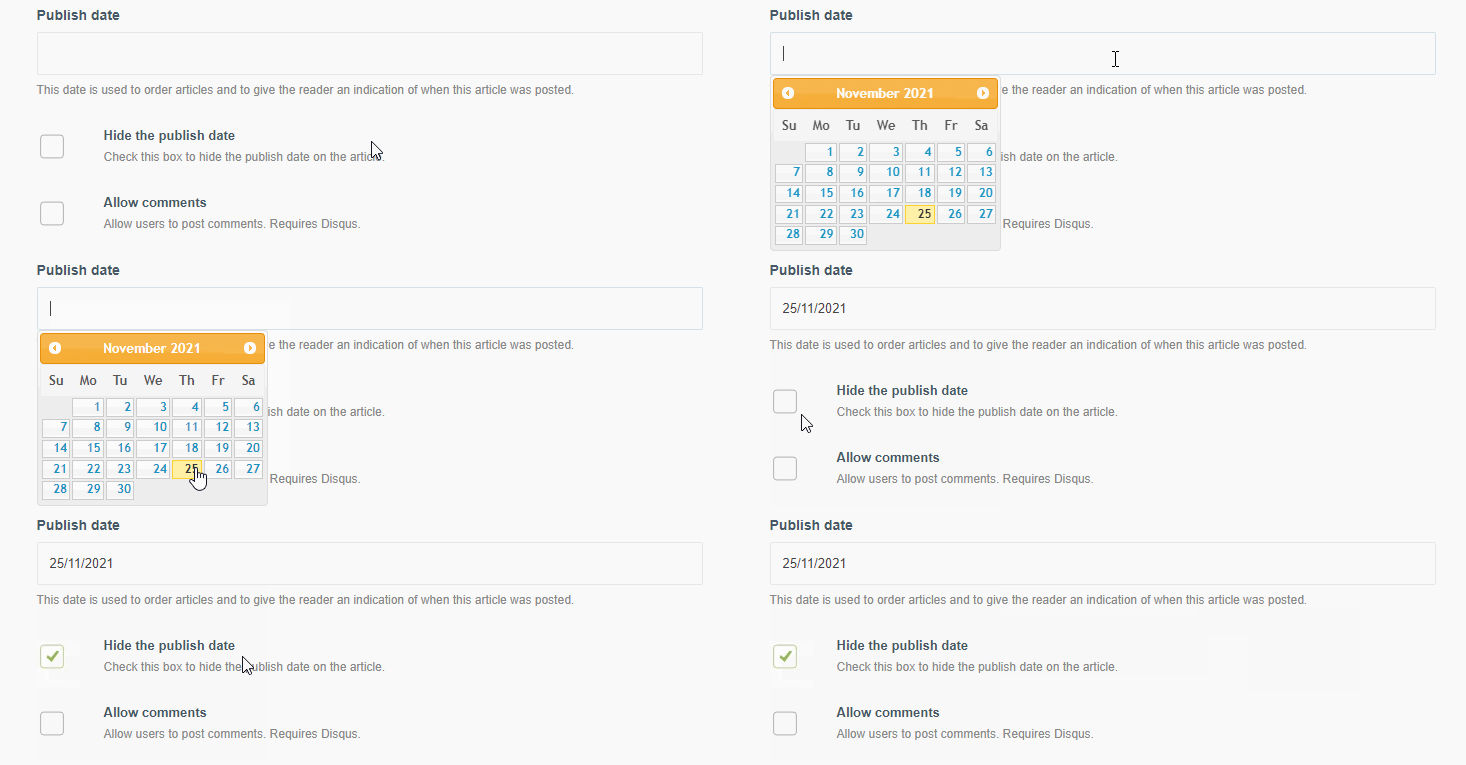
Step 9: Specify a date in the Publish Date field
Note: This is not the date your article will be published, but this will be the date that will be displayed on your article on your website once Live. Optionally, you can Hide the Publish date.

Step 10: Check the Allow Comments box in order to enable comments on your article (It's a great way to encourage conversation on your website.)
Note: Springnest uses Disqus for comments. Learn how to link your Springnest account to your Disqus profile.

Step 11: Click SEO Settings in the left-hand menu > Complete the Meta Title, Meta Description and Meta keywords fields > Click Save
Note: Information completed in SEO settings will appear when sharing your post to social media platforms.
Step 12: Click the Go Live button to publish your article

Step 13: A pop-up will appear with the option to share your new article on Facebook and Twitter > Click Share on the specific social media platform you would like > Follow the log in prompts

Helpful Hints:
- Invite your readers to take the next step after enjoying your article by adding a call to action button.
- View our SEO tutorial on optimising your pages and articles for Search Engines.
