
Installing the Mailchimp Widget to your website (Email Marketing Sign-up)
The Mailchimp widget makes it easy to add a mailing list subscription form to your Springnest website. If you use multiple audiences in Mailchimp, you'll need to choose which audience you would like website subscribers to be added to. The sign-up form appears horizontally in your footer area, and will automatically match the colour palette and font combination of your site. Choose for a series of Calls to action best suited to your email marketing strategy and brand.
Step 1
Select the Website tab > Click Widgets > Select Mailchimp from the drop-down menu
Step 2
Click the Link your Mailchimp Account button
Step 3
A new window will open, prompting you to sign in to Mailchimp using your business username and password. Enter your details and click Log In. If you forgot your Mailchimp password, you can reset it here.
Step 4
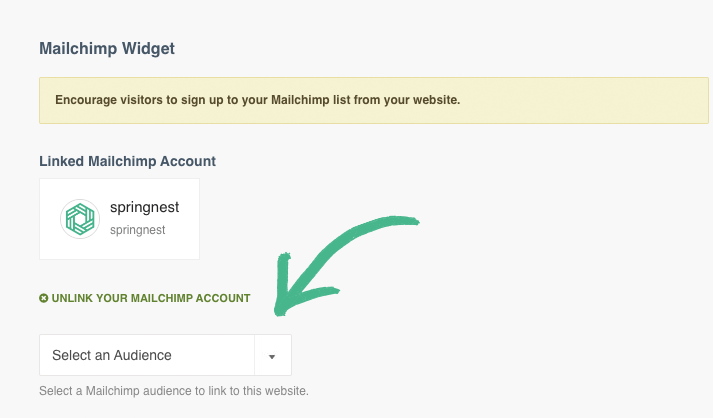
You will be redirected to Springnest Admin, where your Mailchimp Account will be successfully linked. If you have multiple audiences in Mailchimp, select which audience you would like your website subscribers to be added to. If you do not have multiple audiences, you will see that your default audience is already linked; no action needed here.
PS. Having multiple audiences is a Paid Mailchimp feature
Step 5
Select the Call to Action (Button Text) you prefer to appear alongside your sign-up form.
Your widget is now active
Once you select your audience or change your Call to action, your settings will automatically save, and the page will refresh. You will now see your Mailchimp widget in the footer of your website:
Removing your widget
To remove your Mailchimp widget from your website, select the "Unlink your Mailchimp Account" link in the widget.