
Creating a new event
Events allow you to publish upcoming experiences, activities, and occasions on your website. You can create an event, add the key details, and publish it when you are ready.
Create your event
Step 1: Select the Marketing tab > Click Events

Note: Here you will see a list of your current, upcoming, and past events, including events that are live and hidden. In the left-hand menu, you will also see universal Events options such as Layout Editor, Event Types, Event Venues, Event Settings, and the default top banner for your events feed page.
Step 2: Click the Create an Event button > Enter an Event Name > Click Create
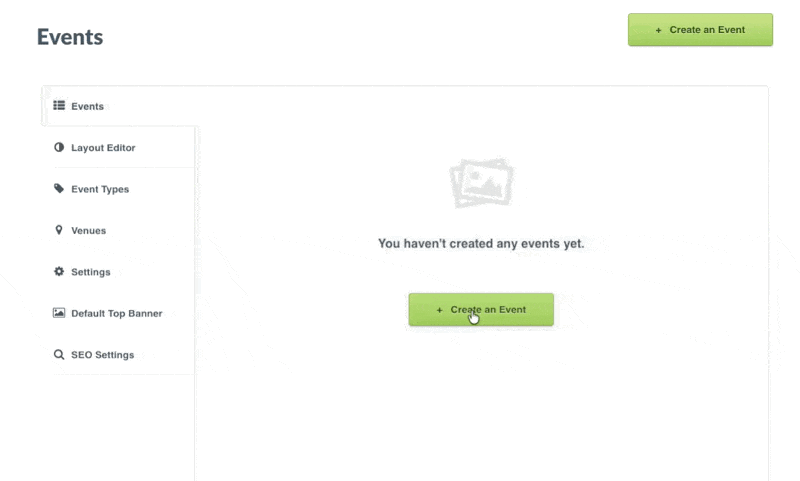
Note: Your event has now been created and will remain Hidden until you are ready to publish it.
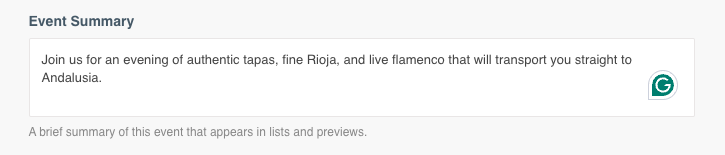
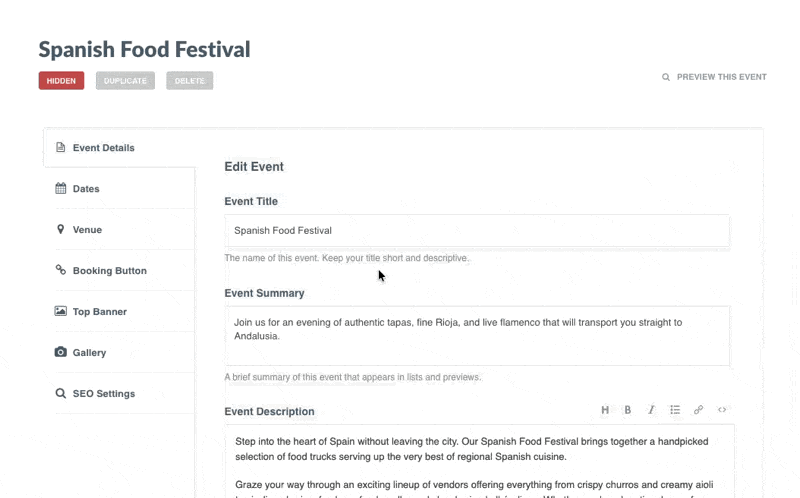
Add Event Details
Step 3: Add an Event Summary. The summary should explain the event in one or two sentences, focusing on the main value of the event and what guests can expect.
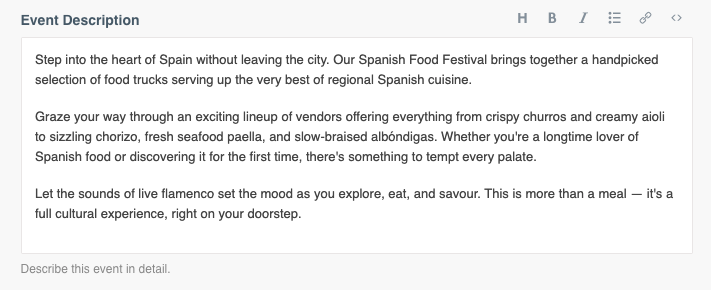
Step 4: Optionally add an Event Description. Use this field if you want to include additional detail about the event.
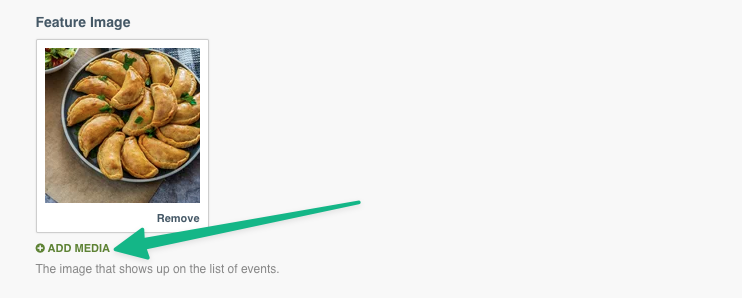
Step 5: Click Featured Media to add an image for your event
Step 6: Select an Event Type: You can choose an existing event type or create a new one while building the event.
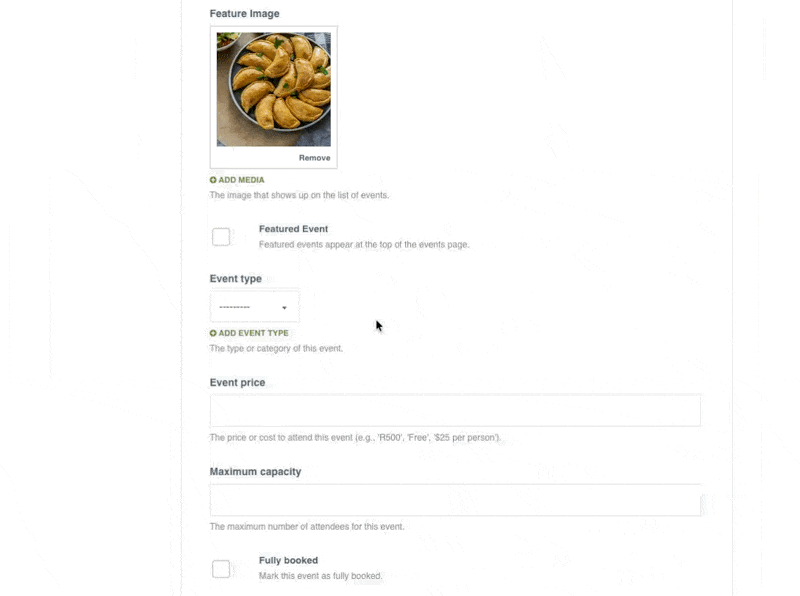
Step 7: Optionally add a Price: You can enter an amount, write Free, or leave this field empty.

Step 8: Optionally add a Maximum Capacity
Step 9: Select a Booking Policy: Use this dropdown to indicate whether a booking is required or whether walk-ins are allowed.
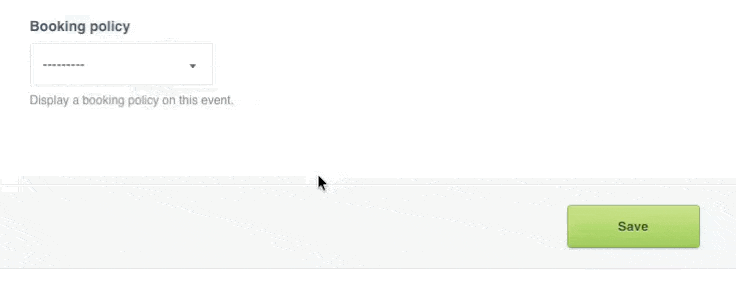
Note: Tick the Fully booked checkbox if the event is fully booked. This is useful if you want to keep the event active and visible on your website while clearly showing that it is no longer accepting bookings or enquiries. A fully booked label will appear on both the event page and the events feed page.
Set Event Dates
Step 11: Open Select Dates > Click Add a Date > Select a date from the calendar > Optionally add a time
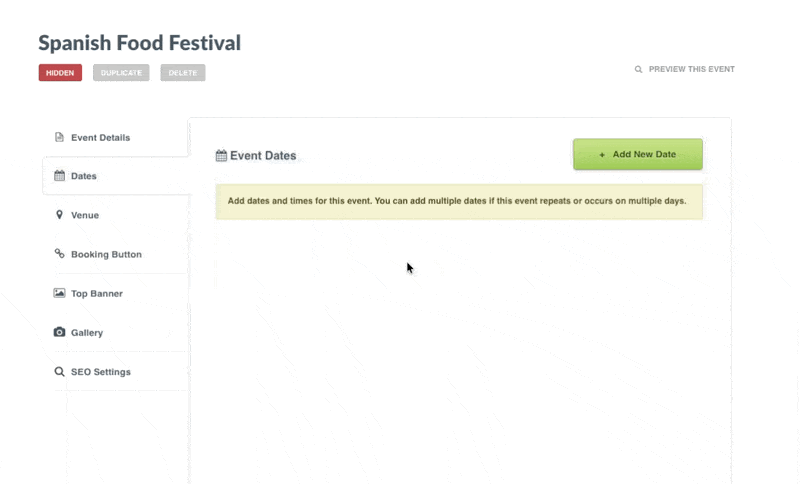
Note: You can add one or multiple dates. These dates will be displayed on the event, and once all dates have passed, the event will automatically be marked as a past event.
Step 12: Use Custom Dates Text if you do not want to add fixed dates or times. This is useful for flexible or open-ended date wording such as Every Tuesday, weather permitting. Events using custom date text will not be automatically marked as past events.
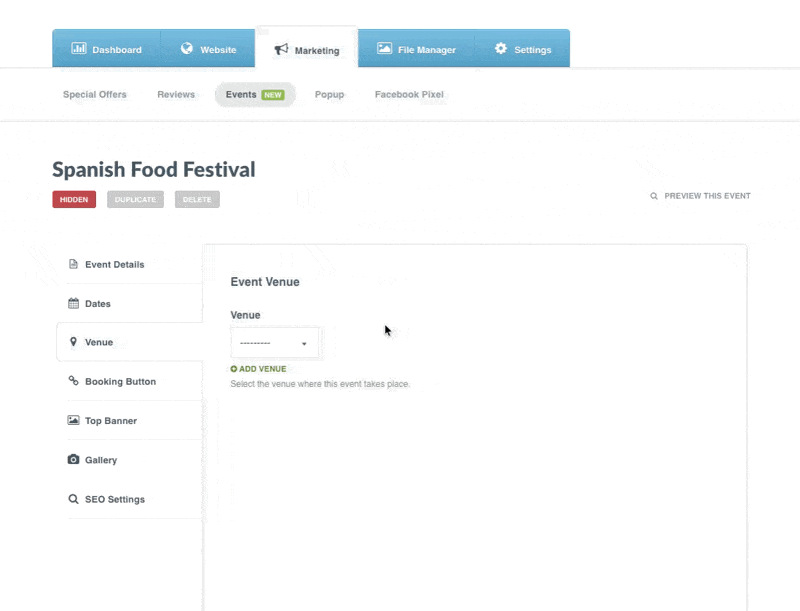
Set Event Venue
Step 13: Open Venue > Select a venue from the dropdown. If the venue does not exist yet, you can create a new venue here.
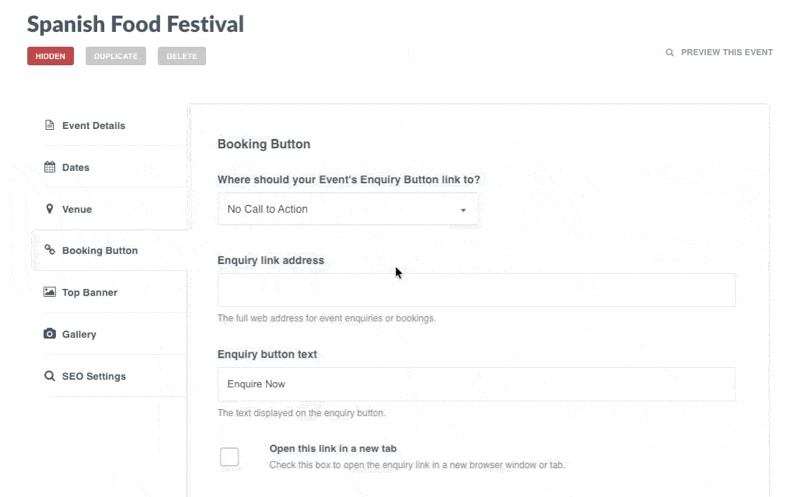
Set a Booking Action
Step 14: Open Booking Button > Select the booking action you want to use
Note: By default, this is set to No call to action, which means no booking or enquiry button will appear on the event. You can also choose a Pop-up Form, your Contact Page, or a Custom Link if you want to send visitors to another website to book tickets.
Step 15: Customise the Booking Button text if needed > Choose whether the link should open in a new tab
Add a Top Banner
Step 16: Open Top Banner to optionally add a custom top banner for this event
Add a Gallery
Step 17: Open Gallery > Add images for the event
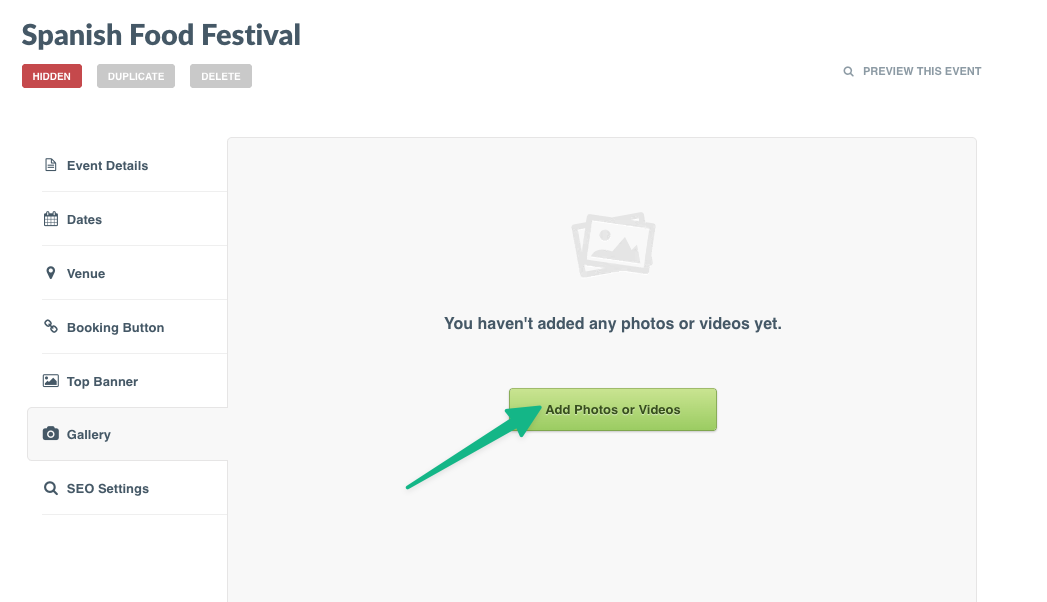
Note: Once images are added, Springnest will automatically build a gallery layout alongside the event content.
SEO Settings
Step 18: Open SEO Settings to optionally customise how your event appears in search results > Add a custom Meta Title > Add a custom Meta Description > Update the URL if needed
Note: Springnest will automatically generate default SEO settings using your event content. You only need to update these fields if you want more control over how the event is presented in search engines.
Preview and Publish
Preview your event > When you are ready to publish, click Go Live > Your event will now be visible on your website
Note: Once published, the event will appear on your Events feed page. If this is your first event, Springnest will automatically create your events feed page and add an Events item to your website's menu.
Tip: To change the order in which events appear, return to the main Events list in Springnest admin and drag and drop the events into the order you want. By default, events appear in the order they were created.