
Setting up a comment box in your Blog via Disqus
Adding a comment box to your blog or news articles is a great way to encourage conversation and to get your content shared. Springnest makes use of a third-party commenting service called Disqus.
In this guide we show you how to add commenting functionality to your website's blog, using Disqus.
Step 1: Signup or Login to Disqus with your social media account or email address via Disqus
Step 2: You will be redirected to the Disqus homepage > Click your profile icon in the top right-hand corner > Select View Profile
Step 3: Your profile dashboard will appear > Click the settings icon in the top right-hand corner > Select Add Disqus to Site
Step 4: You will be redirected to the Features page > Scroll to the bottom of the page > Select Get Started
Step 5: Click the I want to install Disqus on my site block

Step 6: Complete all the fields > Click the Create Site button
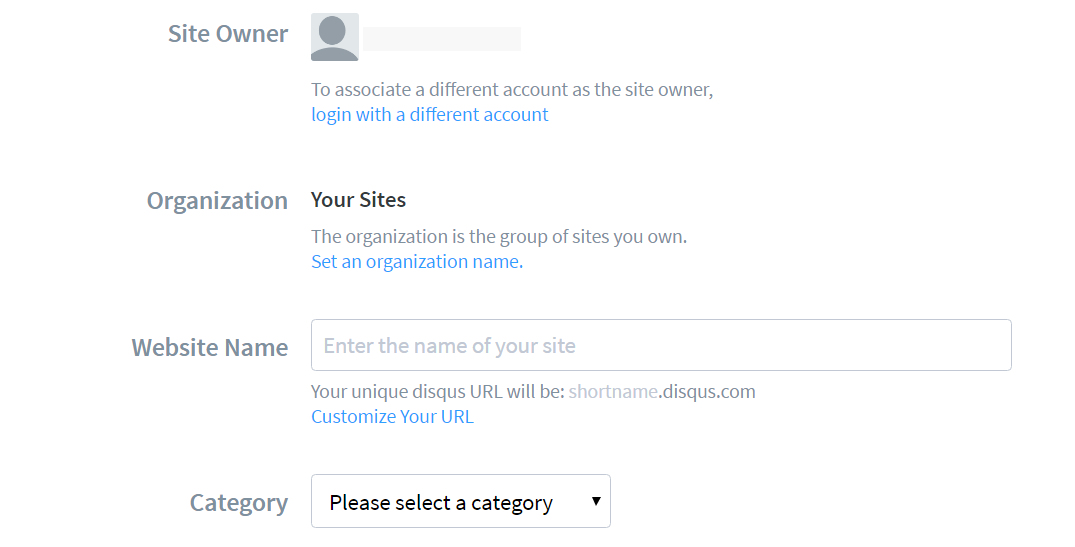
Step 7: Select the Settings tab > Select the General in the left-hand menu > Copy your Shortname
Setting up Disqus in Springnest:
Step 1: Select the Website tab > Click on the Articles section
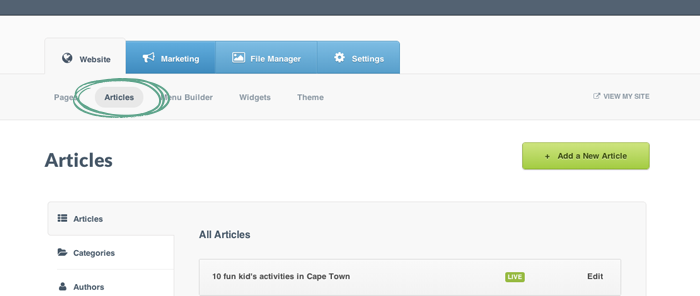
Step 2: Click on Comment Settings in the left-hand menu
Step 3: In the Disqus shortname field, paste your shortname
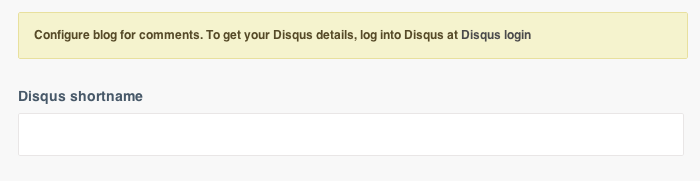
Step 4: Click Save > Your Disqus comment box will now appear at the bottom of your articles on your website
Note: Ensure that you have ticked the Display Comments box in your Articles